

Product Photography
As you may have noticed, if you follow my socials, that there has been a major increase in images of Coffee and Beer and Watches as well as other kinds of products. Product photography has been something that has intrigued me for quite some time.. there’s a lot of “tricks” in product photography which can make it very hard to learn because these tricks take a long time to master and learn. Covid put a HUGE damper on photography, just like it’s put a damper on a lot of things in 2020 and this led to a lot of down time in the photo world for me. As you know I shoot a lot of concert photography as well and with concerts being almost non-existent, I needed to keep my skills in check some how, so product photography it is.
Winter is here (even though it’s 17ºC out right now and full sunshine), and that means photography is at another stand still as I don’t own a studio that makes it a lot harder to shoot. Products can be done at home in a small space so this is perfect for me. A challenge with product photography is, well…. getting product! starting out you have to spend some cash, you need to go out and buy products to shoot. Think hard about what kind of product you want to shoot: Watches, Cologne/Perfume, Foods, House Hold Items, Camera Gear, Coffee, Beer etc… there are tons to choose from. I’m bad for wanting to get good at everything, so start shooting everything and apparently this is bad for the Instagram world as viewers tend to get confused on what your “thang “ is…. I mean, why can’t my thing be everything?!
Some of you might have seen my newest venture on Instagram is called @BeansandHopps a page based on 3 of my loves, Coffee, Craft Beer and Photography! This is all product photography and content creation and it’s all shot at me leisure in my bedroom lol. I have a small space maybe 6’x6’ where I get all this done. When deciding on your product area of focus, take into consideration what I mentioned before… “at first you have to buy your own product”. This is important because products are expensive.. some more than others. If you choose Camera Gear, or Watches or Tech …. that stuff costs so much money that trying to keep your content flowing will break the bank! Now there are some ways around this.. and i’m sure they are frowned upon by some companies but ……. you go out or online, you buy the product, you photograph it then you return it and get your money back. MAKE SURE YOU CHECK THE RETURN POLICIES or you’re getting stuck with a nice bill and this will only work for a few products from the same place, they will catch on and you won’t be able to keep going with it.
YouTube is a great place to learn product photography, the internet is loaded with tutorials and soon I hope to jump on the old band wagon and start doing some tutorials and bringing you all along on some shoots, but first I have to move! Yep moving to a new small town and to a small apartment, so the challenge of trying to do product shoots might get even harder with such a small space! back to YouTube, lots of ways to learn, you have the ability to watch product photographers shoot and teach and you can even learn some of the product “tricks” I was talking about on there. Next big thing you need to learn is lighting! because you’re working in a “studio environment” light is hard to come by so you need to make your own. This requires studio strobes, or Speedlights, me personally, I use speedlights… they get the job done, they are small for small spaces, you can adjust the power output on them and they make modifiers for them to help control and diffuse the light output. I use the Yonguo 560 IV set up as you can control the flash power right from your camera and don’t have to run around to each flash to adjust the power, makes life a lot easier. Yongnuo are great flashes, hold up well, last long and they are pretty inexpensive for such good flash units, the flash power output isn’t always consistent with them but a few little adjustments in photoshop, which you’re probably going to do anyways is all it takes.
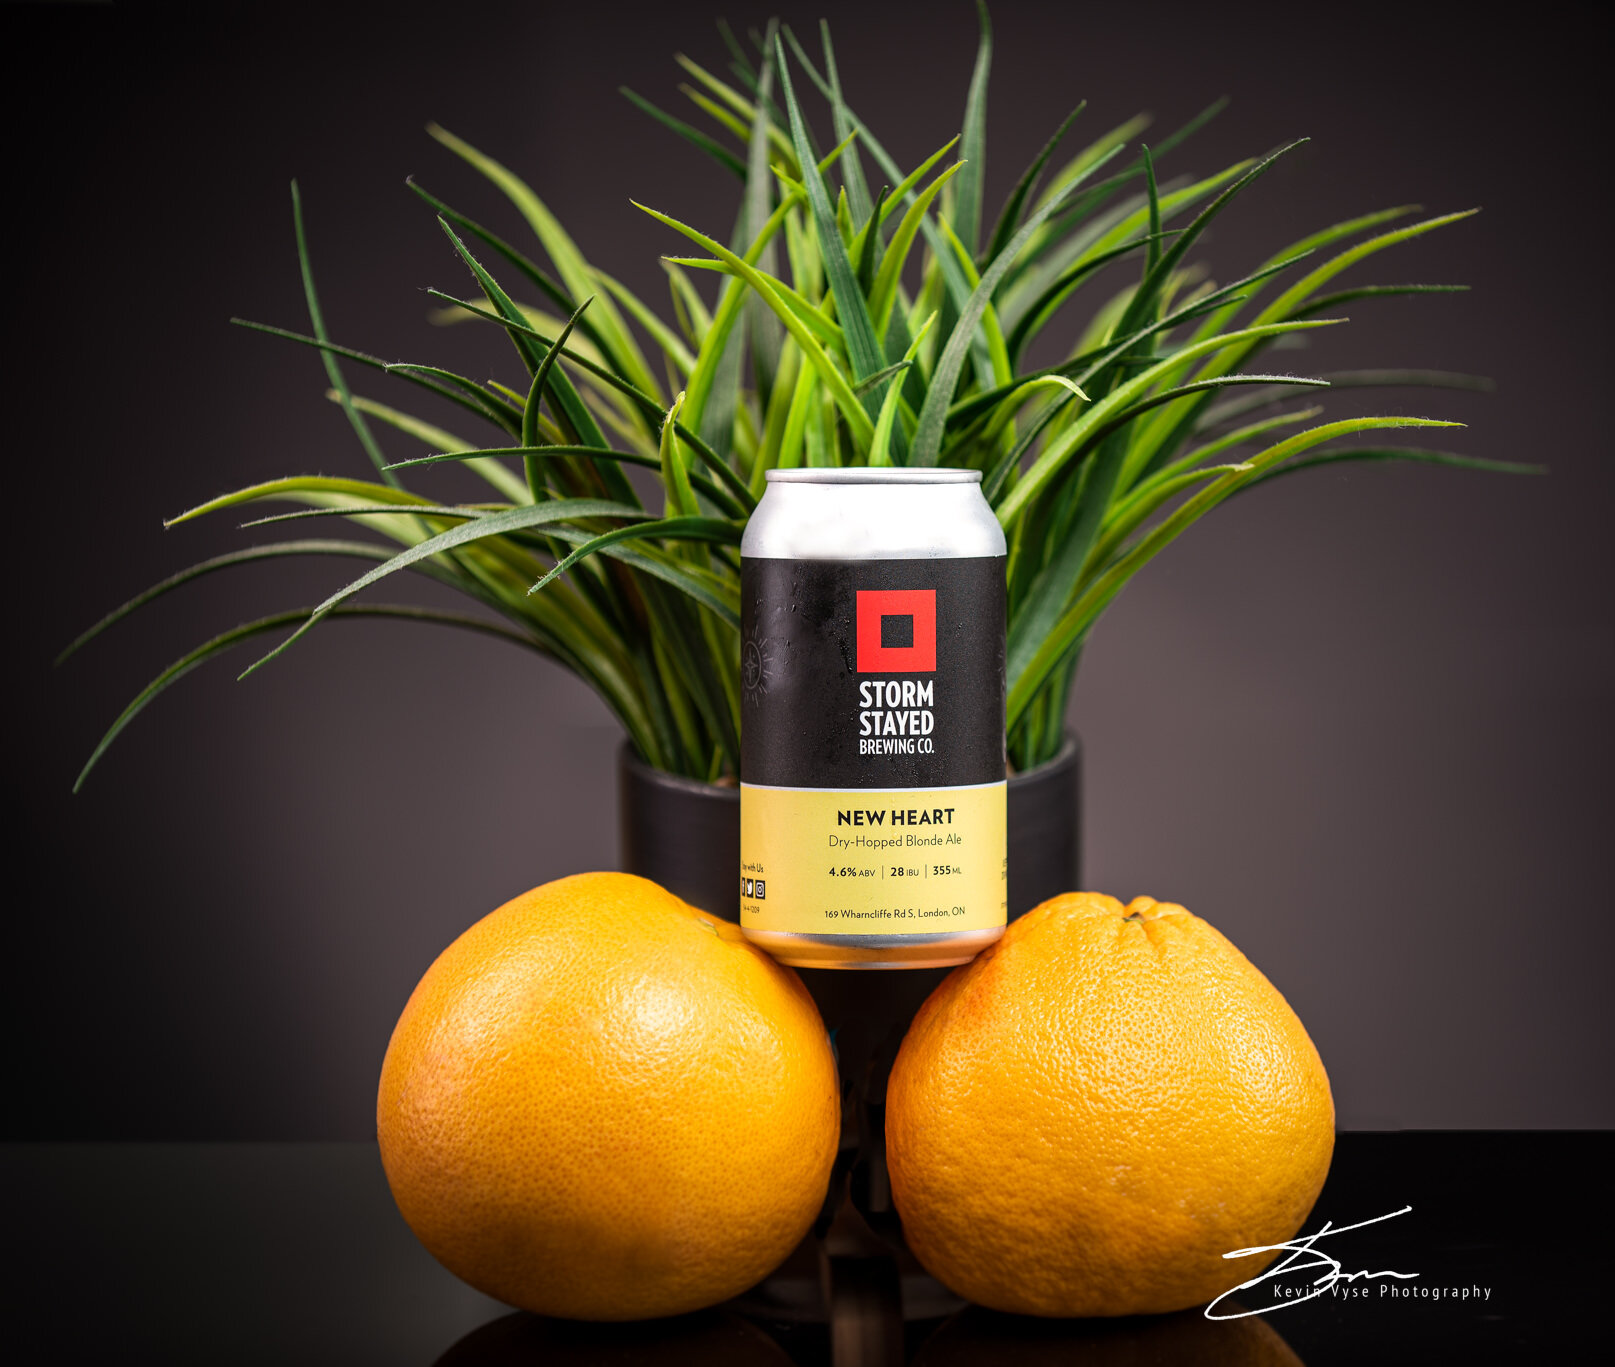
Next up, Modifiers… you need these to help control where the light goes and soften the light. Strip Boxes, Octaboxes, Beauty Dishes are all very important. Umbrellas can work as well, but I feel these are kind of old school I have some but never use them, but they will definitely work and are a cheaper way to go. You can light a lot of things with just one light and you will get some great results… here’s some examples of one light making some drinks look great!

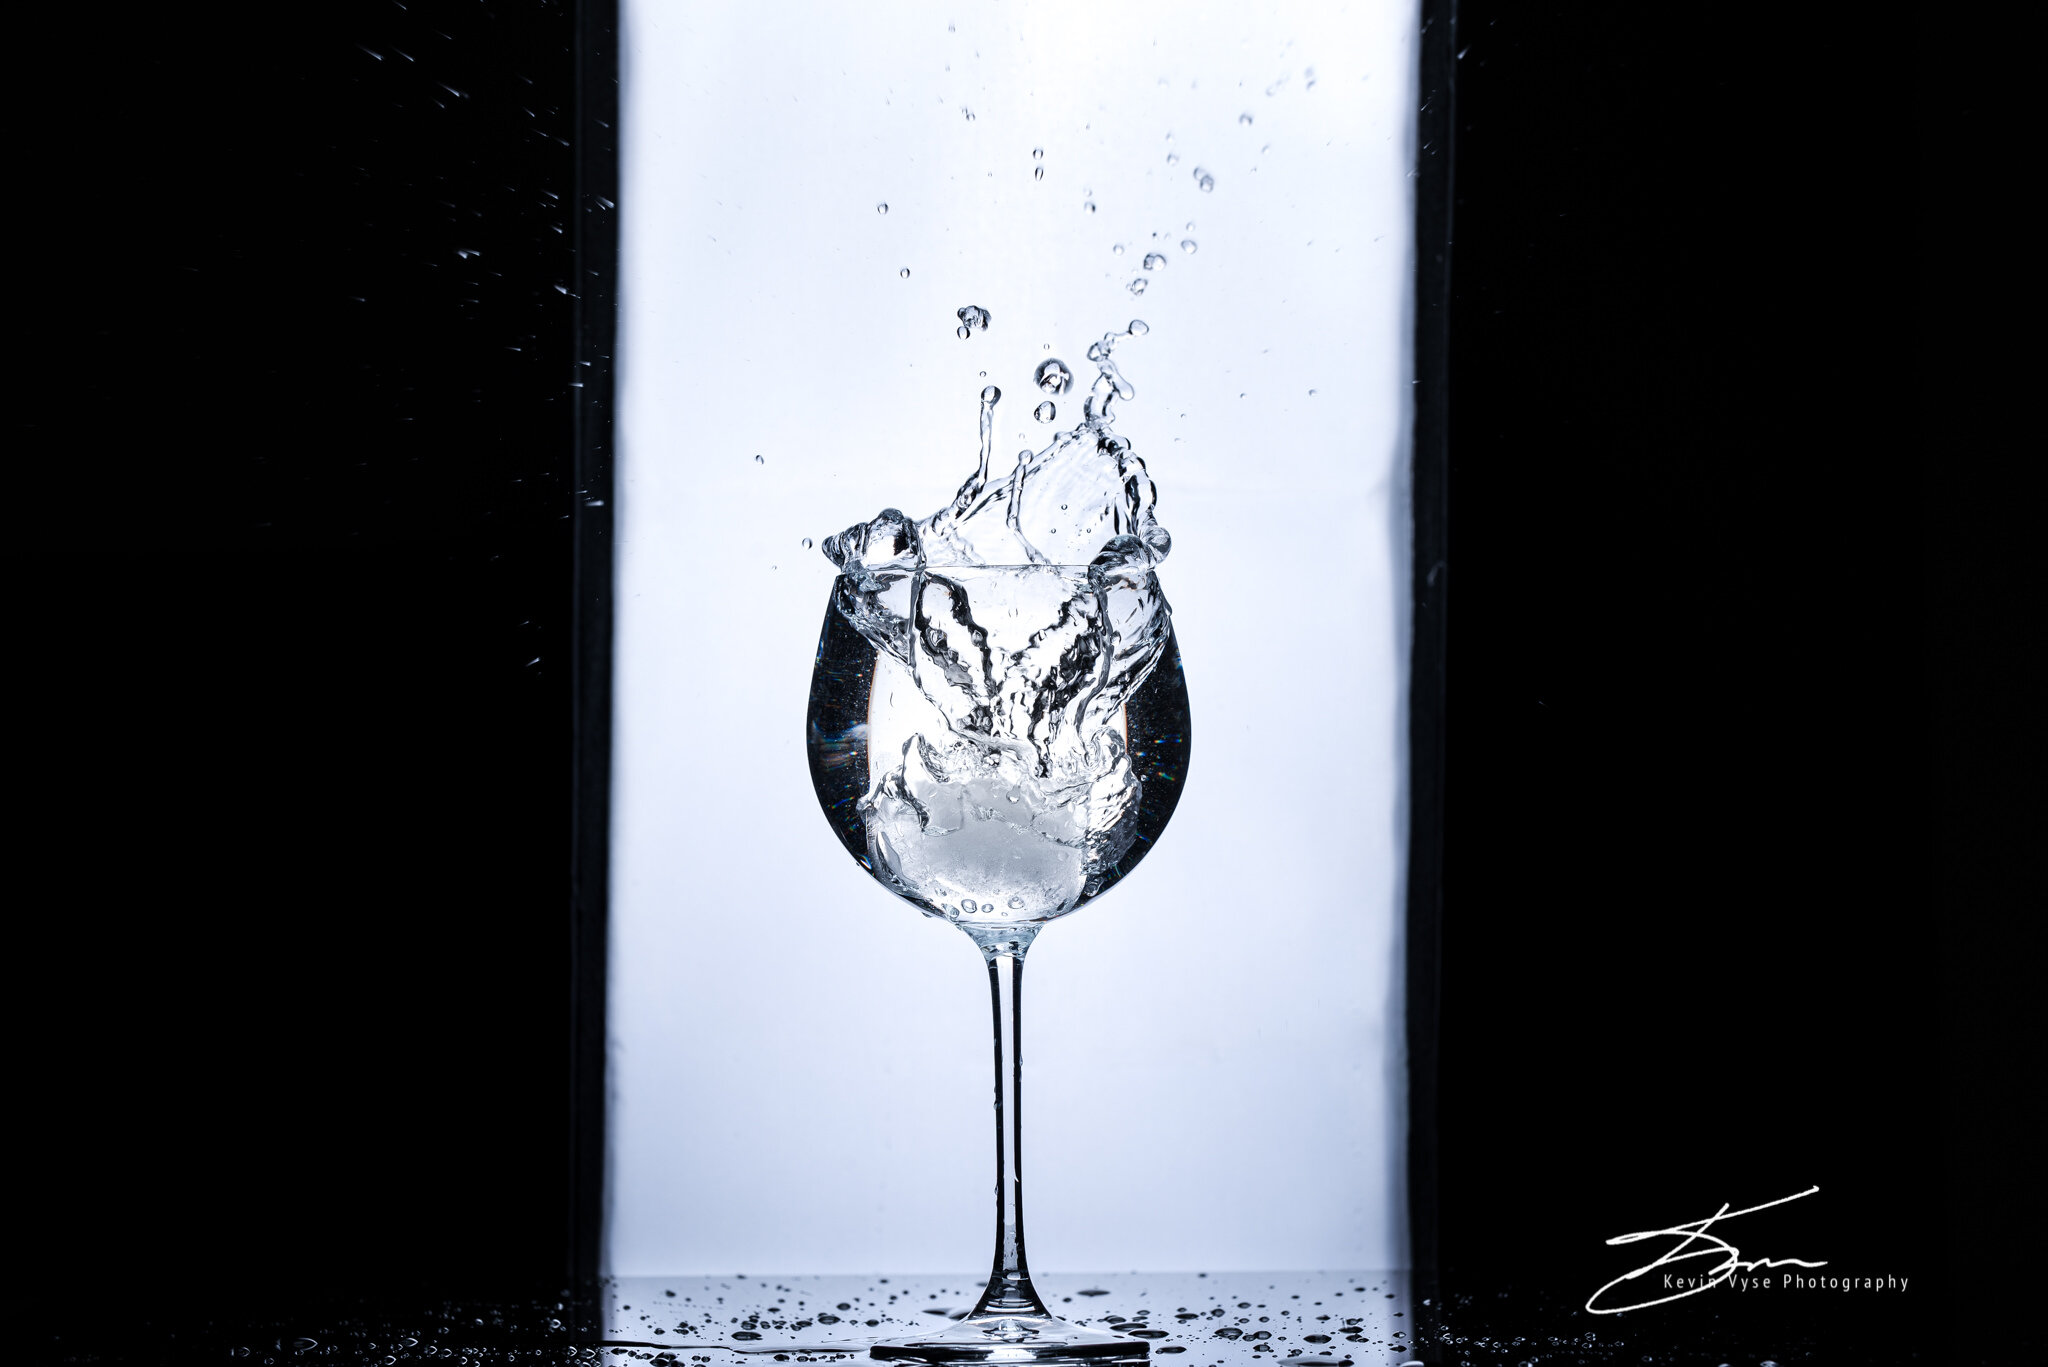
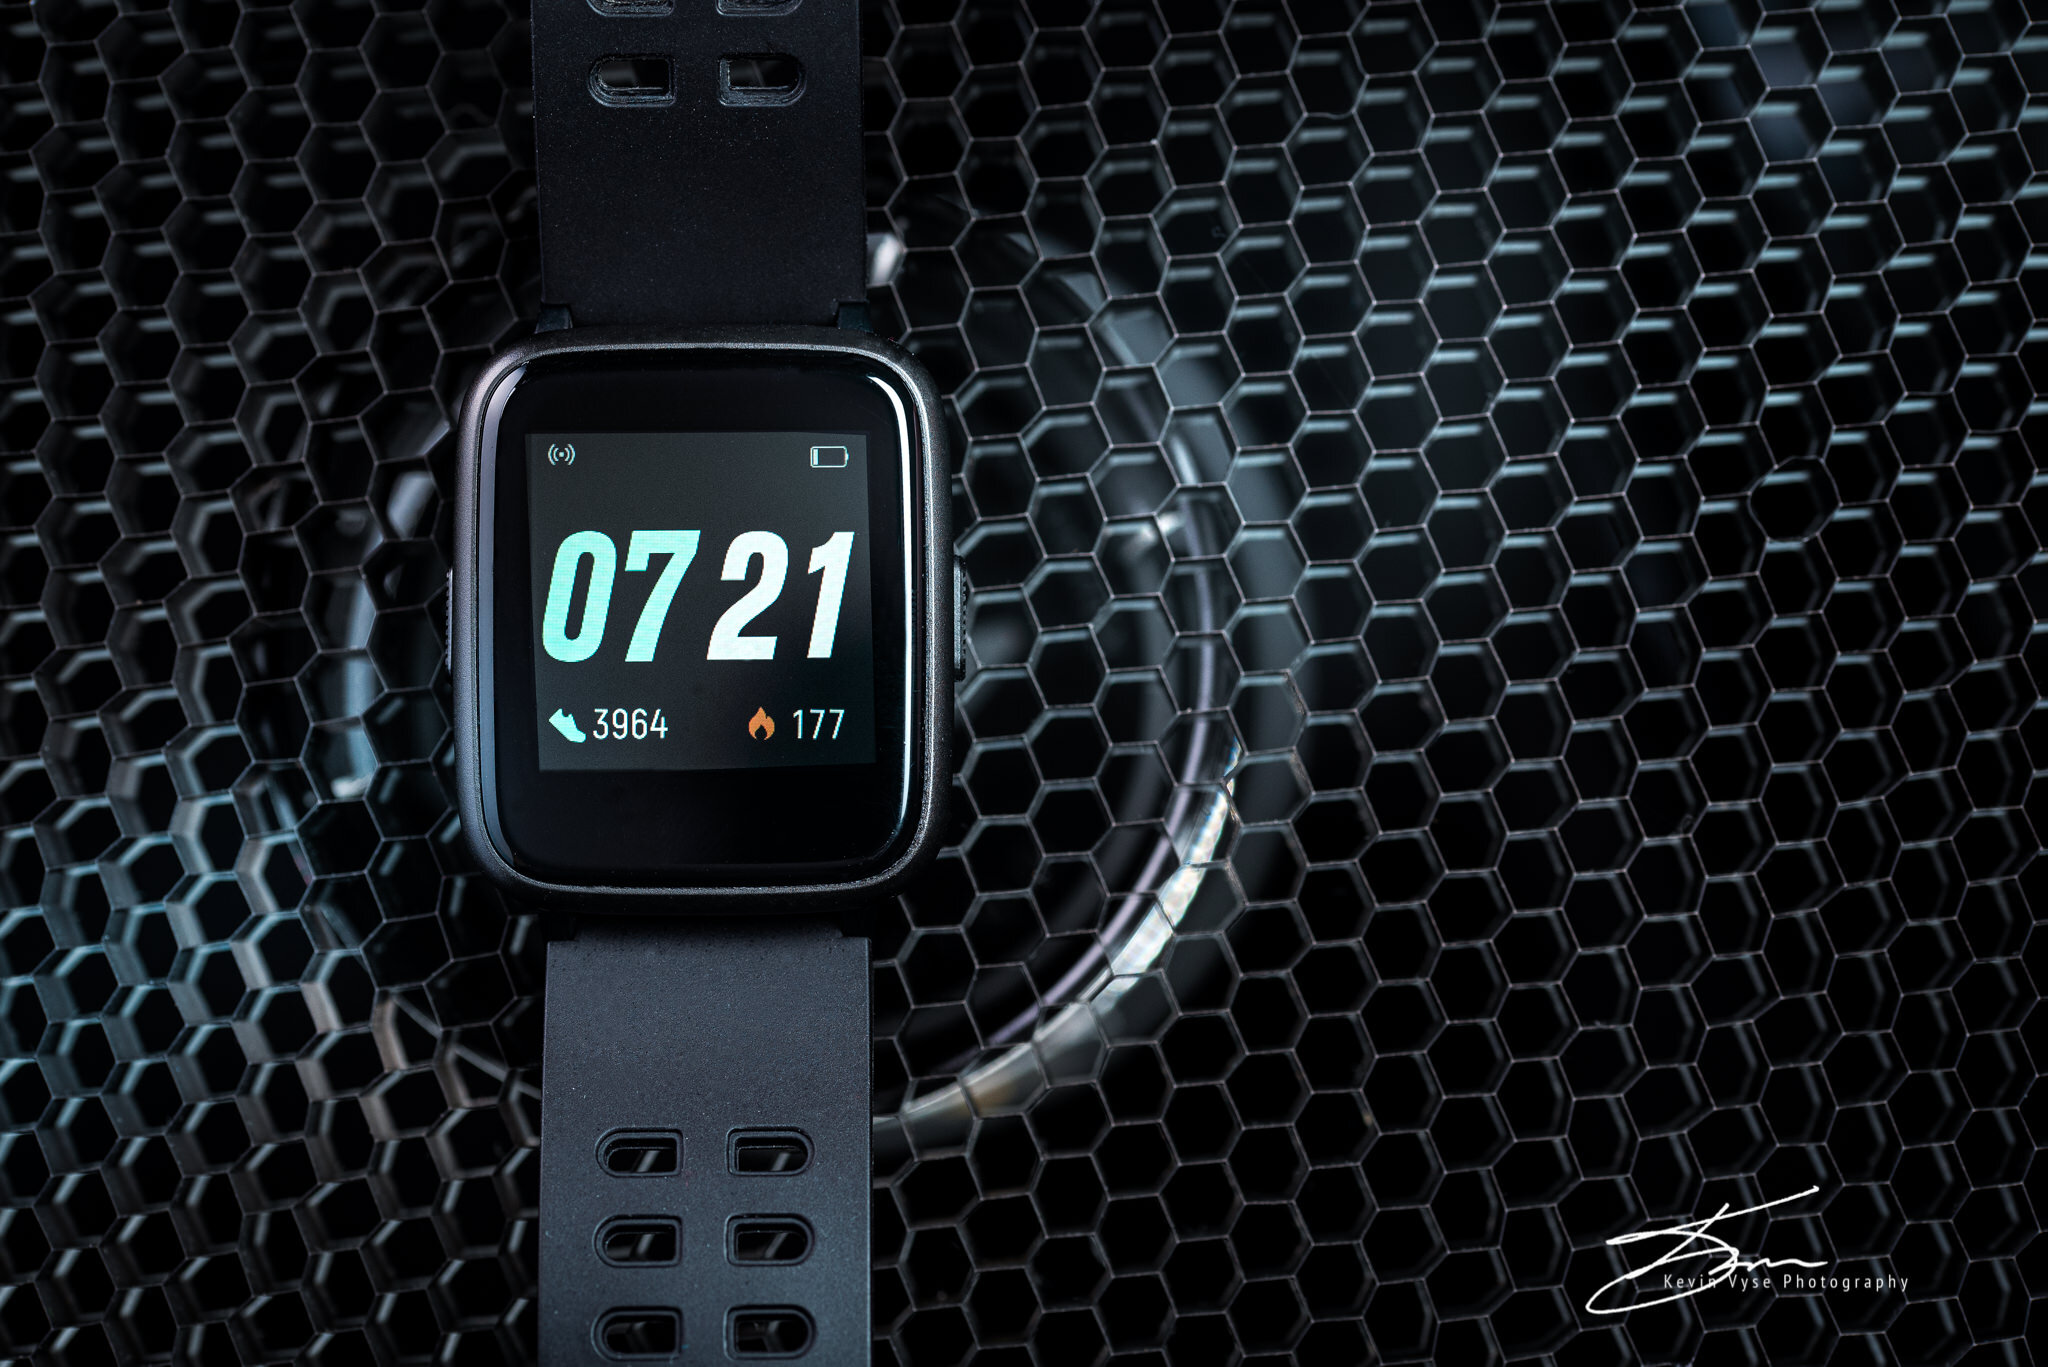
One light can do a lot, it’s effective… and that’s all done with one Speedlight and one Stripbox so as you can see it’s very effective. More lights becomes more challenging because each light needs to work with the other lights to shape the product and you have to make sure the multiple lights aren’t overpowering each other to much or adding to much light to the entire product and washing it out. Multiple lights are very useful though and a lot of times that’s how you get images to look “ Like a Pro”. There are lots of techniques used with light to get the final image: Light Painting, Image Stacking etc… those are something maybe i’ll cover another time, for now you can google those there’s so much info on them on the interwebs. If you can though.. get at least 3 lights and 3 modifiers. I’d go with two strip boxes and one Octabox.. that’s my go to set up, pretty much everything you see from me i’m using that exact set up, their shapes really help me do my thing. Learn Flash Power, Flash to Subject distance and the Inverse Square Law, Feathering Light, Lighting Setups…. Now for the hard stuff.. reflective surfaces… Glass, Metals, Plastics… these all reflect light an insane amount and that means whatever light you point at them you are going to see “hot spots”. Hot spots are where the lights intensity is the “hottest” and will show up on your product.. this is where “feathering the light will come in handy. Also.. scrims.. I use scrims to filter the light even more putting it inbetween the light source and the product, this makes the light softer and will put a nice highlight on the product. Light position will also make a HUGE impact. Ok this post is getting quite long and I know you’re not going to read all of this so i’m going to stop here and once I get some tutorials up and going on YouTube I will share a link or blog on here for you… for now.. take a look at some of the product stuff I’ve been doing over the last few weeks.
CRRJU Watches


2015 WNU FITNESS CALENDAR
Well, it's that time of year again!! welcome to the 2015 WNU FITNESS CALENDAR photoshoot.
Dedication, Strict diets, long hours in the gym, time management... this is what it takes to get the bodies you see in magazines and thats what our models have been doing for this calendar... well not specifically for this calendar.. this is their life style.
This year two calendars were made.. 24 people! 12 males and 12 females for a male and female calendar.. WOW! I know, thats a lot of people, but they were amazing people, easy to work with, fun and ripped! We shot this calendar over 4 weekends, we had planned on shooting about 6 people a day, but like with anything in life.. people get busy plans must change so we work around it to get the job done, which is what we did and we pulled it off.
WNU Fitness is selling calendars to raise money for two charities: DASO ( Domestic Abuse Service Oxford ) and The Kendall Courts Project, which is an outdoor basket ball court that will have a roof over it so it can be used no matter what the weather is calling for, so kids have more fitness options. Not only did we shoot a calendar but there was a fantastic Party that followed. GOFF HALL in Woodstock On. was rocking with special guest, DJ FLASH from 91.5 The Beat Kitchener spinning all the hits. Everyone was there dressed up all pretty, dancing and drinking the night away. All proceeds from the calendar release party also go toward the two charities.
Overall, I had a blast being part of this amazing cause, meeting new people, pushing the photographic boundaries, my knowledge and editing abilities. I'd like to shout out a big THANK YOU to WNU for bringing me on board as the official photographer and for all their shout outs on social media and Rogers TV promoting my photography, you guys are fantastic! Can't wait to hear the finally tally raised. - Shutter Click.
Kevin Vyse Photography
All Rights Reserved 2015
Kevin Vyse Photography
All Rights Reserved 2015
Kevin Vyse Photography
All Rights Reserved 2015
Kevin Vyse Photography
All Rights Reserved 2015
Kevin Vyse Photography
All Rights Reserved 2015
Kevin Vyse Photography
All Rights Reserved 2015
Kevin Vyse Photography
All Rights Reserved 2015
Kevin Vyse Photography
All Rights Reserved 2015
Kevin Vyse Photography
All Rights Reserved 2015
Kevin Vyse Photography
All Rights Reserved 2015
Kevin Vyse Photography
All Rights Reserved 2015
Kevin Vyse Photography
All Rights Reserved 2015
Kevin Vyse Photography
All Rights Reserved 2015
Kevin Vyse Photography
All Rights Reserved 2015
Kevin Vyse Photography
All Rights Reserved 2015
Kevin Vyse Photography
All Rights Reserved 2015
Kevin Vyse Photography
All Rights Reserved 2015
Kevin Vyse Photography
All Rights Reserved 2015
Kevin Vyse Photography
All Rights Reserved 2015
Kevin Vyse Photography
All Rights Reserved 2015
Kevin Vyse Photography
All Rights Reserved 2015
Kevin Vyse Photography
All Rights Reserved 2015
Kevin Vyse Photography
All Rights Reserved 2015
Kevin Vyse Photography
All Rights Reserved 2015
Kevin Vyse Photography
All Rights Reserved 2015
Kevin Vyse Photography
All Rights Reserved 2015
Kevin Vyse Photography
All Rights Reserved 2015
Kevin Vyse Photography
All Rights Reserved 2015
Kevin Vyse Photography
All Rights Reserved 2015
Kevin Vyse Photography
All Rights Reserved 2015
Kevin Vyse Photography
All Rights Reserved 2015
Kevin Vyse Photography
All Rights Reserved 2015
Kevin Vyse Photography
All Rights Reserved 2015
Kevin Vyse Photography
All Rights Reserved 2015
Kevin Vyse Photography
All Rights Reserved 2015
Kevin Vyse Photography
All Rights Reserved 2015
Kevin Vyse Photography
All Rights Reserved 2015
Kevin Vyse Photography
All Rights Reserved 2015
Kevin Vyse Photography
All Rights Reserved 2015
Kevin Vyse Photography
All Rights Reserved 2015
Sexy and Confident Boudoir
Beauty comes from with in, when a woman feels sexy and pretty she can do anything. Boudoir is about bringing women to this level, making them feel sexy, gorgeous, confident and beautiful. Cassidy's session was for her boyfriends birthday, so we got together and planned out a nice boudoir session for him. Not only was it for him but it was also for her, as every women deserves to feel sexy and confident.
- Shutter Click
She sits in the warm sunlight as it beams in through a near window.
Engaged with a gaze
Sitting in a pool of light, she makes her connection
A night in planning supper
she gets ready in the mirror and the shadows.
Hair/Fashion/Glamour OH MY!
Cans of hair spray flying, make up pallets blasting colour all over, dresses, shorts, shirts, bra's, shoes all around me. This was what it was like on set a few weekends ago in London, Ontario as I got together with Hair Stylists Cassidy and Jodie, jodie also does make up, to do a hair shoot for the Salon they work at.
Our goal was to set up some simple portraits to show case different elaborate hair styles so we can place some of the images in to hair competitions. But first, before we got into the hair shoot, we decided we would do a little photoshoot for Cassidy to get warmed up. We did the shoot in Jodi's loft which is gorgeous.. 13' high ceilings, crown moulding, all open concept, big windows and a rooftop with an old fire escape... as you can imagine it's a great location with endless possibilities. Due to living in Canada and it being winter.. the rooftop didn't work out for us because it was covered in deep snow, but it will be used this summer with out a doubt.
After Cassidy's shoot, the other model's ( Ellie, Alex and Shelby) showed up so we could get started on hair and make up, this was around 2pm. Alex and Ellie were up first, so we started shooting against my white seamless backdrop, shooting some head shots and some full lengths. It went pretty well, I found that the roll of seamless I have is only good for head shots.. it's only about 4-5' wide which doesn't work well for full body so we decided to move over to one of the walls in the loft and use that. Over all the day/night was a success, it was long ended up being about 11 hours.. but that was with breaks to change looks and change make up, change hair and lenses and lighting set ups.
This post is just a starter post for this shoot... Seeing as how these images are being entered into competitions I can't post a lot of them because we don't know which ones we are entering yet. The ladies are going through the contact sheets to select which images are to be edited for which categories, a lot of them I haven't even edited yet because I want to know which ones are being used instead of editing a bunch that we won't use at all.... Soooooo with that said, I'm going to use this post to show of just a few shots I did of Cassidy in our PRE shoot, and then i'll follow up to this blog post later after the hair images have been selected, edited and entered for competition. Hope you enjoy these images. - Shutter Click.
Loved the wallpaper here, made for a great backdrop and a nice neutral colour to make her hair and skin pop.
This was one of my favourite locations.. Here I had to brave the deep snow on the rooftop to get down to the landing on the fire escape, and shoot Cassidy as she leaned out the window of the loft for a fashion/glamour kind of look.
The bedroom was an outstanding space.. Huge King size bed with this amazing headboard and a giant window behind it making for an awesome amount of backlight to create nice separation and get that hair glowing.
Kevin Vyse Photography Blog:
Keep up to date with every shoot from Families to Concerts, Weddings to Travel. Day to day shoots all broken down into how I it went, behind the scenes, and my thoughts through the shoots.